I'm posting about my attempts to hook up an SSD to my 2009 iMac, which doesn't have a thunderbolt port.
It does however have a firewire 800 port. In theory, I should be able to get a pretty good transfer rate over this, but we'll see!
I got my shiny SSD in the mail a few days ago, I got a Corsair Force 120GB drive which has pretty good number on the anandtech review. I bought an external drive chassis on Amazon that will hold two drive in one of RAID 0, RAID 1 or JBOD. The drive enclosure product blurb claims transfer speeds up to 200MB/sec, which should exceed this SSD's write rate, but we'll see. I haven't researched the signaling speed of firewire 800, so I don't know if that is even physically possible currently. (Update: DUH, it's called Firewire 800, because it's 800Mbit/sec).
The first problem was the the external enclosure only had mounting rails for a 3.5" internal drive, and the SSD is 2.5". Not a big setback, adapter kits are pretty easy to come-by and I found a pretty nifty one on Amazon that wasn't too expensive (picture to come when I get it).
Until that arrives, I have hooked up the SSD through two other methods that are bit of a hack. I have a plethora of external hard drives that sit on a shelf next to me. Most are Western Digital MyBooks, a couple aren't. I got a Seagate Freeagent awhile ago as it was the first 3TB drive available, and I was desperately in need of a bigger drive for my backups. The thing crapped out when I tried to restore and only some quality time with the Mac drive utility tool allowed me to access it and get my data off! The good part is that the enclosure has available an adapter for firewire 800. Over the years I've also bought a couple of Western Digital drives that have Firewire ports. First thing to do was to pull apart the enclosure and remote the electronics that have the firewire interface. The Wester Digital required some heavy convincing with a screw driver to come apart, but I got the guts out well enough. The Seagate Freeagent was very easy. The base on the model I have detaches, and I initially though I would have to pull the enclosure apart to reveal the adapter from the base to SATA, but it turns out that the base's adapter is itself just a SATA port! (so much for paying attention). You can take the base and plug the drive in without further ado.
 |
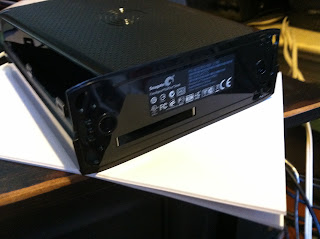
| The Seagate Freeagent base from the side. You can see the Firewire 800 port and the power connector |
 |
| The Seagate Freeagent base from the back. You can see the addition firewire port and a USB port. The main connector is visible here and if you're paying attention (unlike me), you can see it's a standard SATA style connector. |
 |
| This Western Digital MyBook enclosure. The enclosure comes apart by forcing the back loose, then sliding the middle bit out. The middle bit didn't slide out without some serious convincing with a screw driver to break loose the sides. I'm not sure if they were bonded or not, but they did give a reassuring pop sound when they came loose! |
 |
| The back of the Western Digital enclosure. This enclosure has holes where the two Firewire 800 ports are, a hole for an eSATA connection and a USB port. Many of these enclosures only have a USB port, and I had purchased this with the knowledge that I wanted a firewire port available. It turned out to be a bit of a non-issue in the long-run, but it sure came in handy for this! |
 |
| The Seagate Freeagent enclosure. The enclosure comes apart from one side only, which is the side opposite the connector. The casing pops apart, though in doing so I snapped a few of the clips on the inside. Don't bet on being able to put either of these back together afterwards! |
 |
| The bottom of the Seagate enclosure. You can see here the hole where the drive port is exposed. There is no adapter that lives here! The base plugs directly into the drive with clips for the main part of the enclosure itself. |
 |
| This is the SSD docked onto the Seagate base. It's a bit precarious in this position, but it makes a good picture! The drive docks directly onto the base, and the connection isn't great because the base is expecting a gap between the bottom of the drive and the base where the enclosure housing would normally go. |
 |
| Here is the df from the drive. If you can see, it's showing about 116GB usable and 12.6GB used (give or take). |
 |
| This is the guts of the Western Digital enclosure. You can see the SATA adapter on the left. You can plug in the drive to this, and it almost rests on the rest of the case. Slightly less precarious, but also less fast!! |
 |
| The Seagate Freeagent base. |
I did some benchmarks with no other apps running on my iMac, and the results were surprising.
The Seagate base did pretty well, clocking in around 60-70MB/sec both read and write with seeks in the 10,000 range. Not too bad, about the same speed as a regular disk running at full speed, with much better seek performance. The Western Digital interface was a bit disappointing, clocking in at only 30MB/sec or so. The interface has a firewire 800 port, but I suspect it's not running at full speed.
I formatted the drive once I had it back on the Seagate base and mounting a PostgreSQL tablespace. I've created a fairly large database on there, about 12GB, so it gives a fair amount of data to play with.
More to come...


No comments:
Post a Comment